
Home Assistant - Turning On My Sonos When An Orioles Baseball Game is Starting
A few years ago, u/yguns031 posted on Reddit how they created a home automation by connecting to the NHL API and turning a red light bulb on when a goal was scored. While not an everyday use case for home automation, the NHL API and Red Light bulb has spawned many sports-based automations.
A user posted a similar solution on the Home Assistant forums, but for baseball. Having recently migrated to the Home Assistant platform, I wanted to learn more about the development and customization of the platform. My plan used some aspects from both of the above integrations and automatically have a Sonos turn on and play the Orioles game.
Why? Cause it was a challenging way to learn more in-depth coding and automation with Home Assistant. The planned automation takes data from a public API endpoint (MLB), parses it using REST sensors, and uses the game start time as a trigger for a Sonos media player automation.
- Pre-Work
- Step 1 - Getting Realtime Data from MLB
- Step 2 - Setting up Scripts and Sensors
- Step 3 - Building the Automation of API
- Step 4 - Playing Baseball Game on Sonos
- The End Result
Pre-Work
I highly recommend installing the Studio Code Server add-on. Since a lot of the following work requires writing code and altering YAML files within the platform, a simple web-based interface to the code saves a lot of time. The alternative is to code locally, copy files or SSH in, and code via the command line.
Step 1 - Getting Realtime Data from MLB
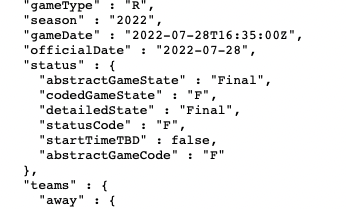
MLB does a great job of exposing game-day data via its APIs. Specifically, the automation I wanted to create required accessing a team's daily schedule and time of the first pitch. The MLB API endpoint provides "gameDate" for each team by "teamId."
Step 2 - Setting up Scripts and Sensors
Honestly, this part (setting up scripts and sensors) took the longest to figure out, primarily because I was going in without any prior knowledge of the inner workings of the Home Assistant platform. The great thing, in hindsight, is that once you build one end-to-end custom automation, future ones follow more or less the same approach.
First, set up a script that will run on an interval to hit the MLB API, retrieve a particular value, and store it locally. If you are a beginner, I strongly recommend placing the script snippet in the configuration.yaml. As you get used to the platform and its intricacies, you can refactor and create a folder called scripts and reference the folder within the configuration.yaml.
LESSON LEARNED - Any change at all to the configuration.yaml file requires a platform restart. Otherwise, your changes to the yaml file won't be picked up.
orioles_update:
  alias: Update Orioles Game Info
  sequence:
    - service: homeassistant.update_entity
      entity_id: sensor.orioles_game_start_time
The script above is pretty readable. My script's alias is "Update Orioles Game Info," It binds the platform service to update an entity with a sensor entity called "orioles_game_start_time." The plan is for the script to call the MLB API and store the game's start time in a sensor defined below.
sensor:
  # Baltimore Orioles sensor
  - platform: rest
    resource: http://statsapi.mlb.com/api/v1/schedule?sportId=1&teamId=110
    name: orioles_game_start_time
    scan_interval:
      hours: 8
    value_template: '{{ value_json.dates[0].games[0].gameDate }}'
    json_attributes:
      - dates
The above snippet can reside in the sensor.yaml file, if it exists; otherwise, it can also go into the configuration.yaml. Again, since it is YAML, it is pretty readable. The platform is "rest", the resource is the API endpoint, and the earlier script references the name. The other values provide a scanning interval and map the JSON value in the MLB API response to the sensor.
Step 3 - Building the Automation of API
While the script written earlier has a scanning interval, I created an automation using the Home Assistant UI to ensure we get the game-day start time on my schedule. To account for MLB games starting at various times (1p, 4p, 7p, 10p), I set the automation to run my script starting at 11 am EST.
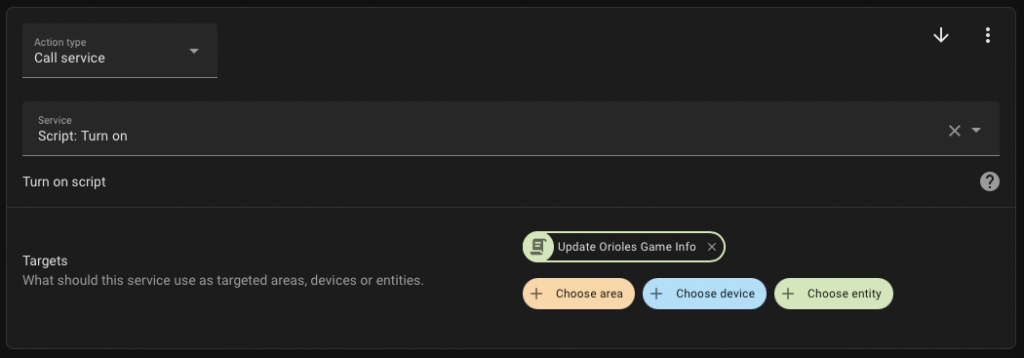
The automation runs at 11 am to call the script, save the resulting JSON value to a sensor, and then convert it to an internal platform value called "input_datetime."
Lesson Learned - Logbook
As with any software development on a new platform, one of the first things to figure out is how to print out values on the screen. Home Assistant offers logbook.log. In short, we can print out any matter of any sensor, switch, or other entity. I wanted to ensure I was getting the date from the MLB API in my script. The code snippet below is the YAML to accomplish writing out a value to the logbook.
service: logbook.log
data:
  name: 'Time of Next Orioles Game (UTC):'
  message: |
    {{ states.sensor.orioles_game_start_time.state }}
Once YAML is added and executed, the output is visible in the UI under "Traces" and "Related logbook entries" (as shown below).

Lesson Learned - YAML and UTC and Local Timezone
In most other programming languages, dates and times are stored in an object and easily manipulated. Because Home Assistant is YAML driven, a custom command is needed to convert UTC (MLB API uses) to my local time zone.
Lesson Learned - Using Input_DateTime vs Sensor
Now that the game day start time is set to my local timezone, I needed to start another automation to turn on the Sonos and set it to a particular channel at the right time. I learned that there is a platform object called "input_datetime," and you can trigger anything off that value.
service: input_datetime.set_datetime
data:
  datetime: >-
    {{ states.sensor.orioles_game_start_time.state | as_timestamp |
    timestamp_custom('%Y-%m-%d %H:%M:%S') }}
target:
  entity_id: input_datetime.orioles_game_start_time
Above is the YAML required to convert the datetime value in the sensor into an input_datetime. Once the game time is set and stored, it's time to do the last step - turn on the Sonos.
Step 4 - Playing Baseball Game on Sonos
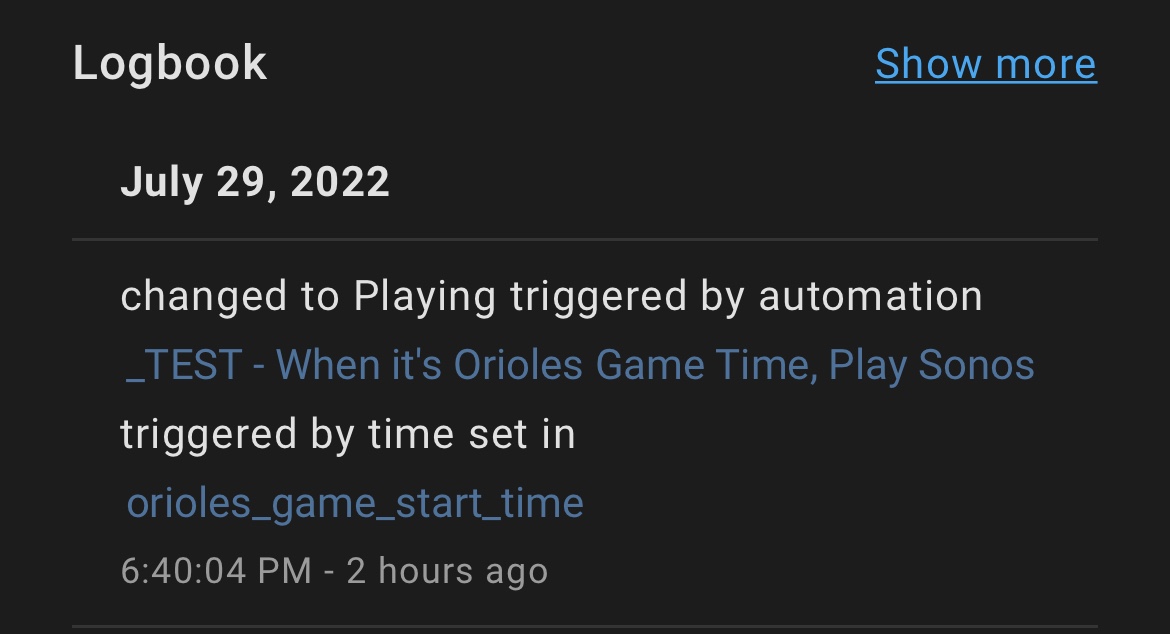
The benefit of using the Home Automation UI is the easy ability with which to build automations. This second automation is simple - triggers off the input_datetime value orioles_game_start_time and plays the game on a Sonos.
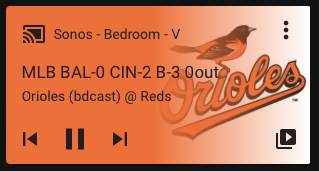
The End Result
Complete Automation YAML Code
MLB API Call to Get the Start Time of the Orioles Game
alias: Data - Check MLB / Orioles schedule at 11am (Daily)
description: ''
trigger:
  - platform: time
    at: '11:00:00'
condition: []
action:
  - service: script.turn_on
    data: {}
    target:
      entity_id: script.orioles_update
  - service: logbook.log
    data:
      name: 'Time of Next Orioles Game (UTC):'
      message: |
        {{ states.sensor.orioles_game_start_time.state }}
  - service: logbook.log
    data:
      name: 'Current Status of Orioles Game:'
      message: |
        {{ states.sensor.orioles_game_status.state }}
  - service: logbook.log
    data:
      name: 'Time of Next Orioles Game (EST):'
      message: >
        {{ states.sensor.orioles_game_start_time.state | as_datetime | as_local
        }}
    enabled: false
  - service: logbook.log
    data:
      name: 'Time of Next Orioles Game (EST):'
      message: >
        {{ states.sensor.orioles_game_start_time.state | as_timestamp |
        timestamp_custom('%Y-%m-%d %H:%M:%S') }}
  - service: input_datetime.set_datetime
    data:
      datetime: >-
        {{ states.sensor.orioles_game_start_time.state | as_timestamp |
        timestamp_custom('%Y-%m-%d %H:%M:%S') }}
    target:
      entity_id: input_datetime.orioles_game_start_time
mode: single
Automation to Turn On Sonos with Input_DateTime Trigger
alias: When it's Orioles Game Time, Play Sonos
description: ''
trigger:
  - platform: time
    at: input_datetime.orioles_game_start_time
condition: []
action:
  - service: media_player.play_media
    target:
      entity_id: media_player.xxxxxx
    data:
      media_content_id: FV:2/14
      media_content_type: favorite_item_id
    metadata:
      title: 842 - Baltimore Orioles
      thumbnail: >-
        http://www.siriusxm.com/cmds/displayLogo?channelKey=9233&clientId=zingpartner&imageType=14
      media_class: genre
      children_media_class: null
      navigateIds:
        - {}
        - media_content_type: favorites
          media_content_id: ''
        - media_content_type: favorites_folder
          media_content_id: object.item.audioItem.audioBroadcast
    enabled: false
mode: single
RELATED POST TO READ
RELATED POST TO READ
Fixing Google Home and its Confusion with TV and Chromecast device when asking "Turn on the TV"
Lesson Learned, Google makes the "TV" a Chromecast when introduced to a room. Meaning you can't override "Turn on the TV".